Scatter Node
- Category: General
- Edition: All editions
- Output type: Positions
- Typical place in a graph: between a mask that says where things grow and an output that spawns them
Scatter places spawn points for trees, rocks, bushes, grass or props across the biome. It lays out points in natural clusters and keeps more of them where the Density mask is bright, so a forest mask becomes a forest. Connect the points to Tree Output, Object Output or Detail Instance Output to spawn things at them.
When to use it
- Place trees, rocks or props from a mask: forests on gentle ground, boulders at the foot of cliffs, bushes along rivers.
- Make natural clumps and groves instead of an even spread.
- Turn any mask into positions for stamping, such as craters or rocks with Splatter 2.
- Not for: grass painted as density (use Detail Density Output with the mask directly); exact, hand placed positions (use Points or Sample Point).
Inputs
| Slot | Type | Required | What to connect |
|---|---|---|---|
| Density | Mask | No | Where points may appear. The brightness is the chance a point is kept: 1 keeps every point, 0.5 keeps about half, 0 removes all. With nothing connected, every point is kept. |
Outputs
| Slot | Type | What it holds |
|---|---|---|
| Output | Positions | The spawn points, on the ground of the biome. Connect them to an output node, or to other position nodes such as Thin Out or Transform Points. |
Properties
| Property | Default | Range | What it does |
|---|---|---|---|
| Spacing | 100, 100 | 1 and up, meters | The distance between base points along X and Z. Each base point starts a cluster, so this sets how far apart the clusters are and, together with Spread Count, how many points there are. |
| Spread Count | 7 | 0, 7 or 15 | Extra points placed around each base point to form a natural cluster. The slider snaps to 0, 7 or 15. Use 0 when each base point should give exactly one point. |
| Spread Distance | 0.05 | 0 to 1, fraction of the biome width | How far the extra points reach from their base point: each lands at a random distance between a fifth of this value and all of it. 0.05 is about 50 m on a 1 km biome. Small values make tight clumps; values close to Spacing hide the grid the clusters start from. |
| Keep Source Points | On | On, Off | Keeps the base point itself in each cluster. Base points sit on a regular grid, so turning this off makes the pattern less ordered. |
| Density Multiplier | 1 | 0 to 2 | Scales the Density mask before points are removed. Below 1 thins the points out everywhere; above 1 fills partly bright areas more fully. At 2, every point is kept wherever the mask is 0.5 or brighter. |
| Seed | 0 | Any integer | Picks another random arrangement with the same look. It is combined with the biome's seed. |
Common properties
| Property | What it does |
|---|---|
| Id | The node's unique name in this graph, shown for reference. You cannot edit it. Scripts and the AI workflow CLI use it to find the node. |
| Split Execution | Lets this node run over several frames so the editor stays responsive during long generations. It only works when Allow Split Execution is on in the graph settings. This node finishes in one step, so splitting only adds a short pause around it; leave it off. |
| Bypass | Skips the node. Scatter cannot pass its mask through as points, so nothing comes out and nothing is spawned from it. |
How it works
- Grid: base points are laid out every Spacing meters. The grid is fixed in the world, so neighboring biomes with the same spacing line up.
- Spread: around each base point, Spread Count extra points land in random directions, at up to Spread Distance away.
- Thin out: each point is kept or removed at random, with a chance equal to the Density mask at that spot times Density Multiplier.
So the number of points you get is about:
(biome area ÷ Spacing²) × (Spread Count + 1) × average density × Density Multiplier
On the 1 km sample biome with the defaults and a mask averaging 0.45, that is about 105 × 8 × 0.45 ≈ 380 points, close to the roughly 390 measured. Halving Spacing gives four times as many points.
Examples
All examples use the same terrain (Noise, Scale 600) on a 1024 × 1024 m biome, with a Slope Mask as Density: full on ground up to about 17 degrees, fading out by 25 degrees, so points avoid steep slopes. The 2D images show that mask in dark red (black where steep) with each point as a white dot. The 3D images show each point as a green pin on the terrain. Values not listed are the defaults.
Default settings
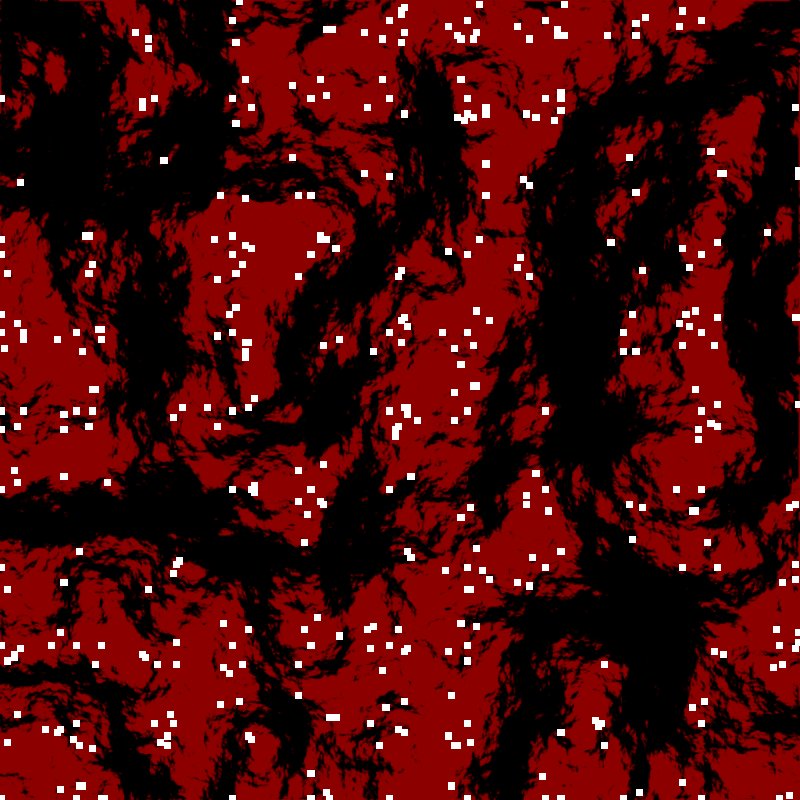
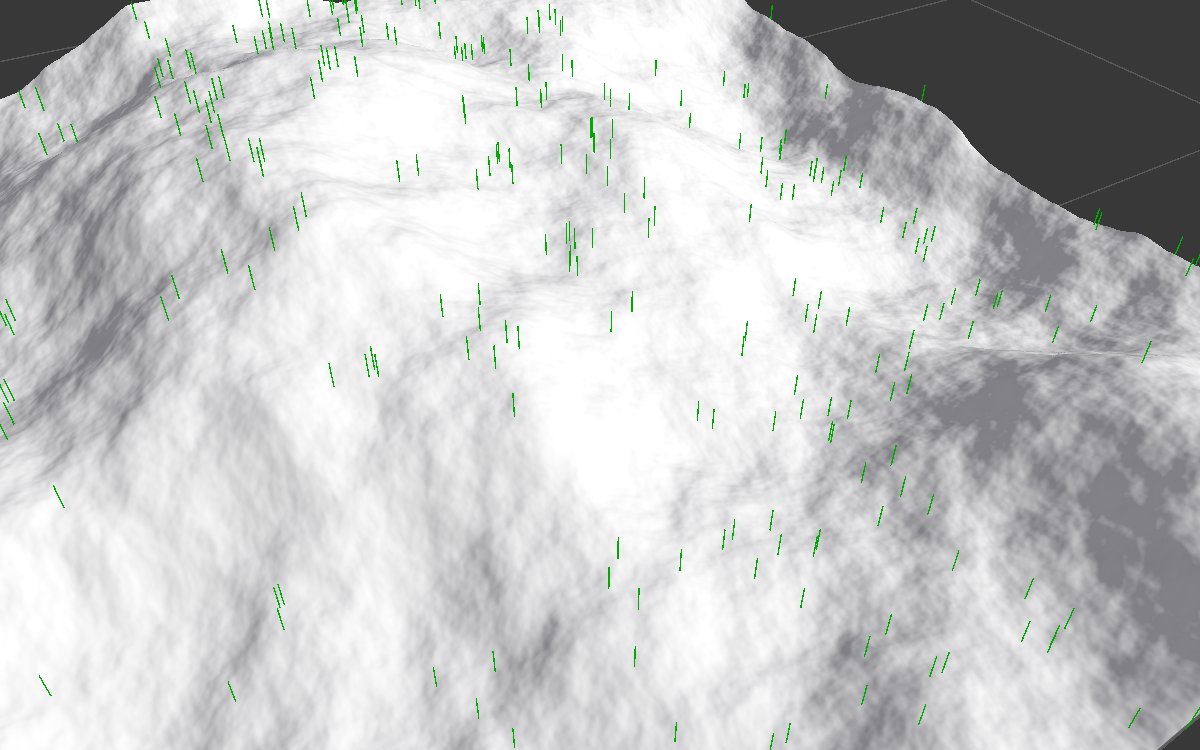
A cluster of up to 8 points every 100 m, kept only where the slope is gentle. The clusters still sit on a visible grid, because they reach at most about 50 m from base points 100 m apart.
No spread: one point per base point
| Property | Value |
|---|---|
| Spread Count | 0 |
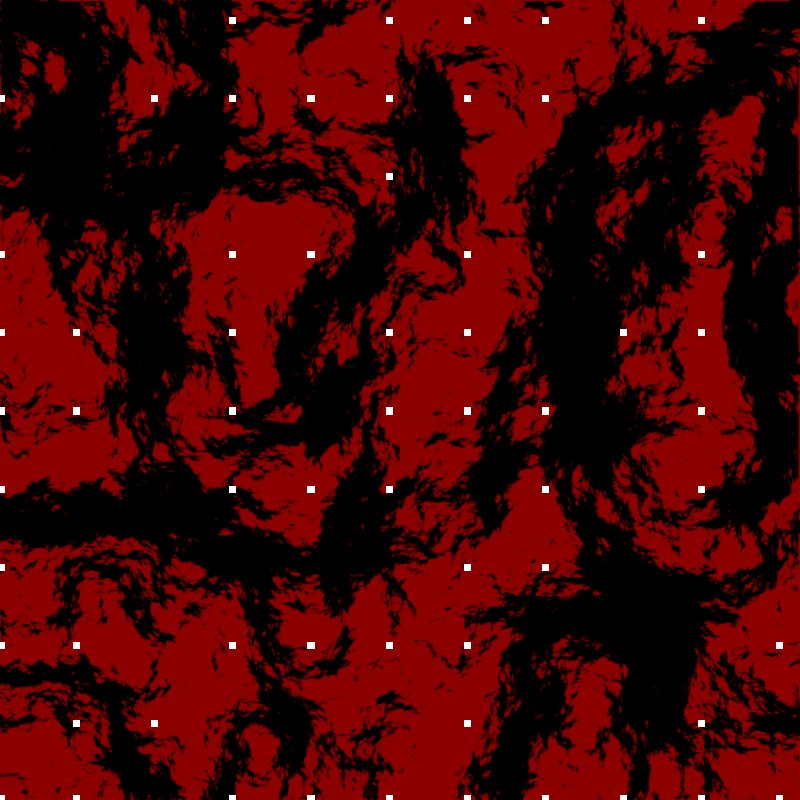

Each base point is now the only point, so there are eight times fewer, and they sit exactly on the 100 m grid. Good for one stamp or one large object per spot; for vegetation it looks planted.
Groves: large spacing, tight clusters
| Property | Value |
|---|---|
| Spacing | 200, 200 |
| Spread Count | 15 |
| Spread Distance | 0.02 |


Up to 16 points within about 20 m of each base point, with base points 200 m apart: small groves or rock clusters in open land.
Dense: small spacing
| Property | Value |
|---|---|
| Spacing | 40, 40 |


About six times as many base points, and the clusters overlap into an even cover that follows the mask closely. With a forest mask, this is a closed forest.
Lower density multiplier
| Property | Value |
|---|---|
| Spacing | 40, 40 |
| Density Multiplier | 0.3 |

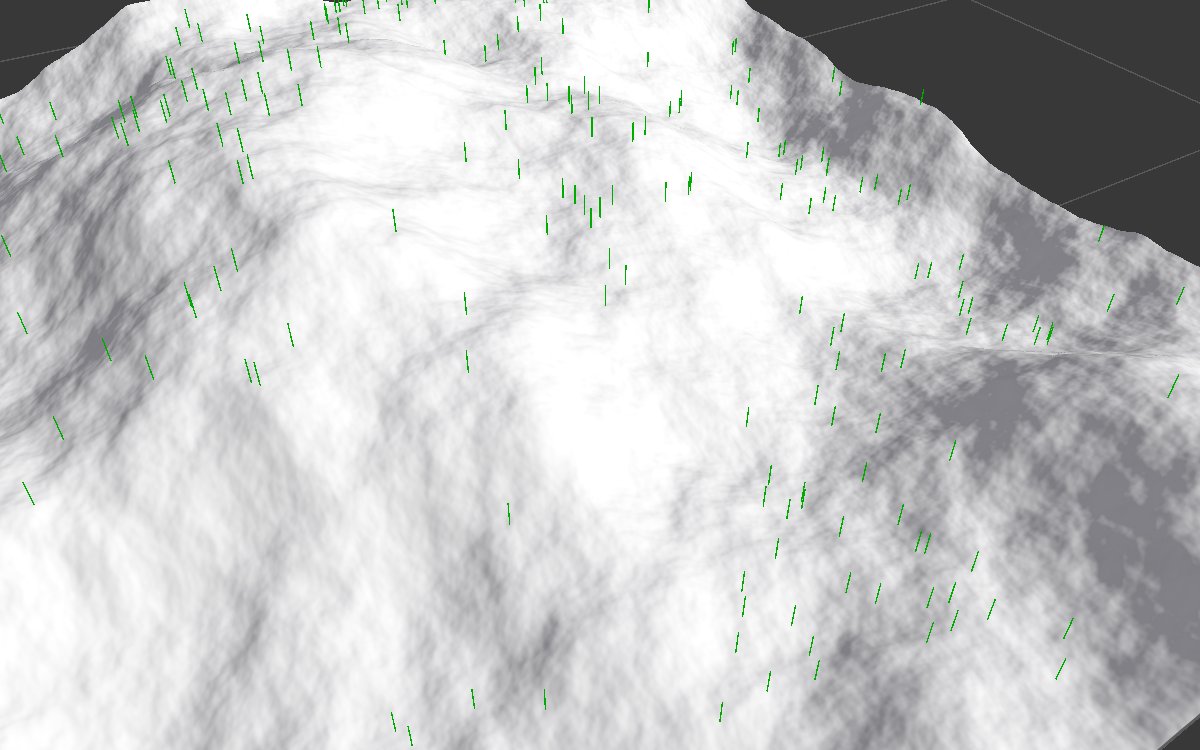
The same dense layout, but each point now has only 30% of the chance to stay. Overlapping clusters thinned this way give an open woodland look without a visible grid.
Without source points
| Property | Value |
|---|---|
| Keep Source Points | Off |


The base point in the middle of each cluster is dropped, so 7 points remain per cluster and none sits exactly on the grid.
Another seed
| Property | Value |
|---|---|
| Seed | 2 |

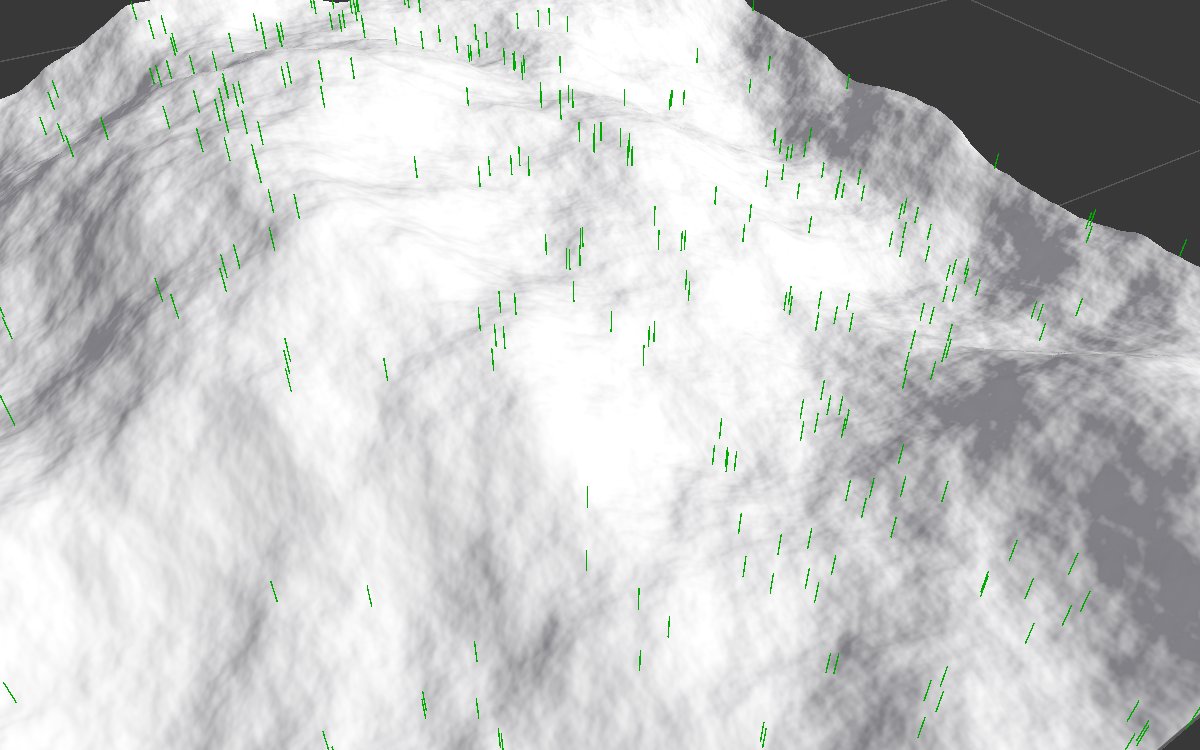
The same amount and look, with different positions. When two Scatter nodes feed different objects, give them different seeds so they do not land on the same spots.
Recipes
- Forest on gentle, green land: green area mask × Slope Mask (or Geometry Mask with a height and slope limit) → Scatter → Tree Output. Recipe
trees-on-green-area. - Boulders below cliffs: a mask of the cliff foot → Scatter (small Spacing, Spread Count 15, a small Spread Distance for tight piles) → Object Output.
- Stamped features: a mask → Scatter (Spread Count 0) → Splatter 2, so each stamp lands once.
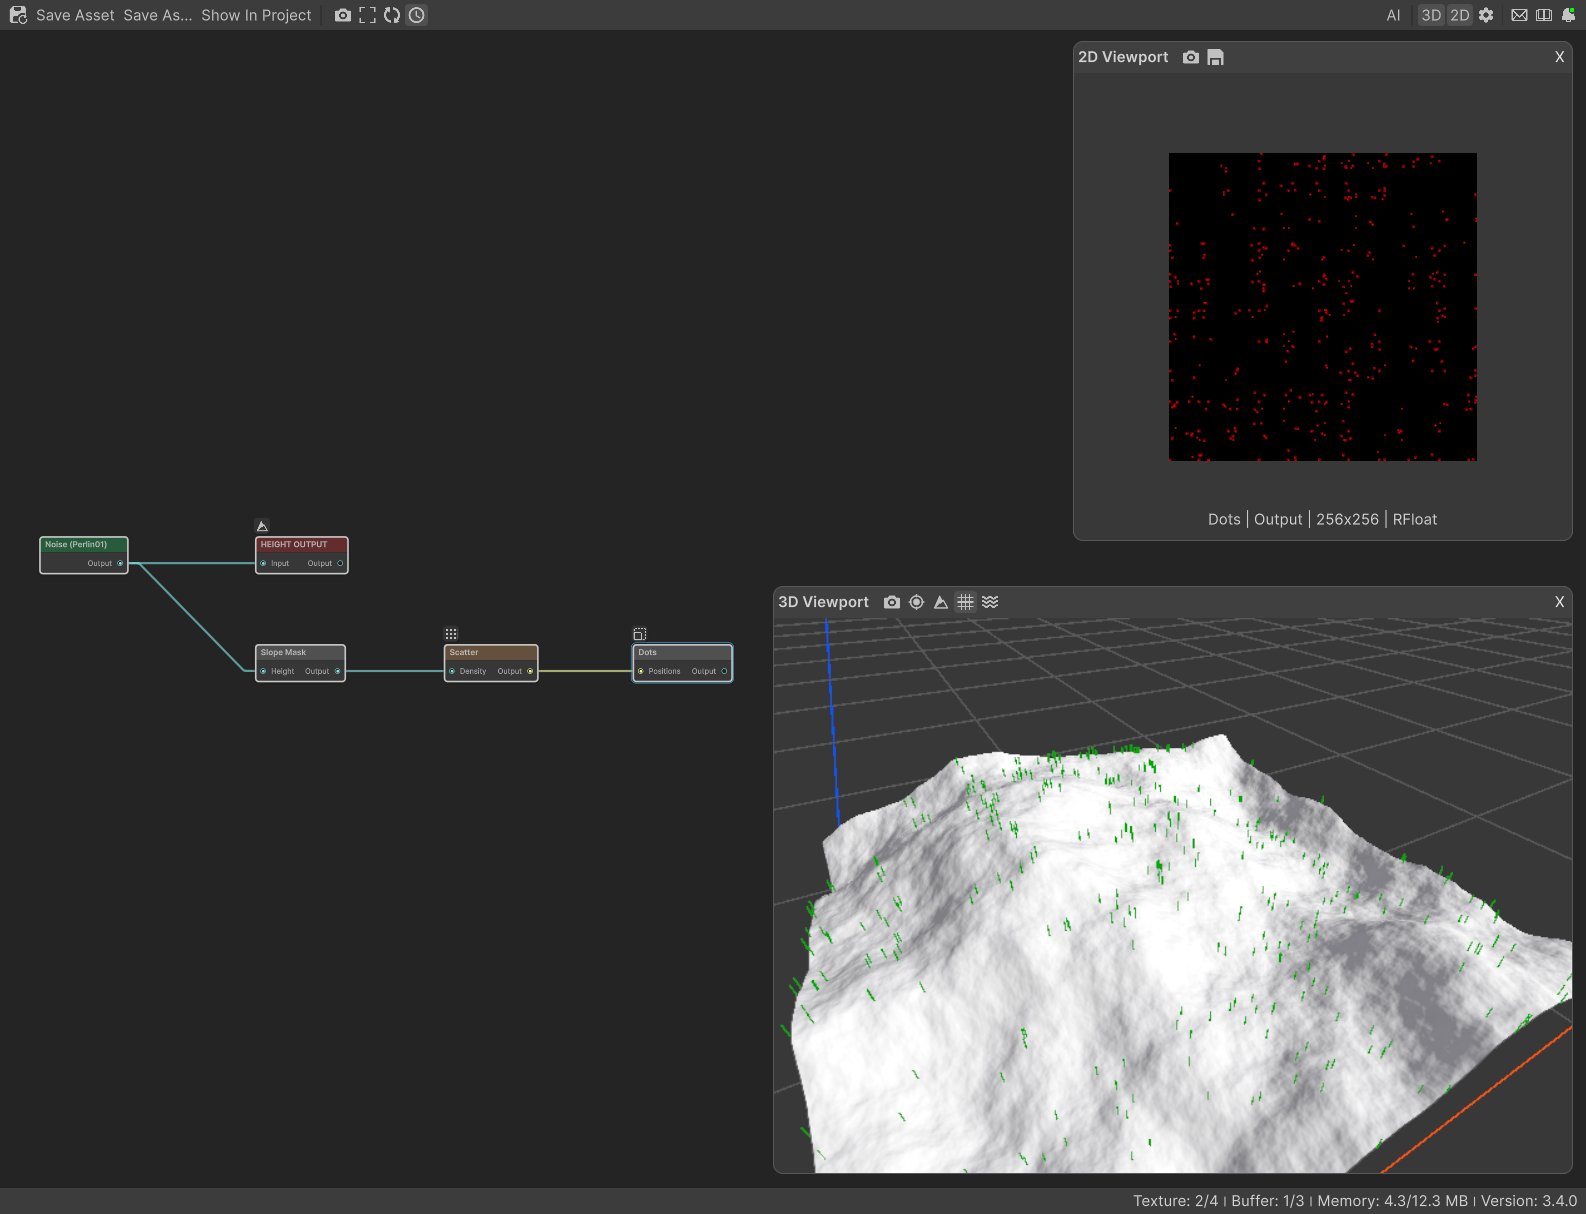
- Preview the points as a mask: Scatter → Dots with an Absolute resolution of about 256, as in the sample graph.
Tip
To hide the grid, raise Spread Distance toward the spacing (as a fraction of the biome width: Spacing 100 on a 1 km biome is about 0.1), or use a small Spacing with a low Density Multiplier.
Tip
Shape the Density mask, not the multiplier, to control where things grow. Soft edges in the mask give forests that thin out gradually at their borders.
Note
Spread Distance is a fraction of the biome width, while Spacing is in meters. On a larger biome the same Spread Distance spreads clusters wider, so check the clusters after resizing a biome.
Warning
With Spread Count 0, turning Keep Source Points off removes every point: there is nothing left to keep.
Warning
Small Spacing values on large biomes create a very large number of points, and every spawned tree or object costs memory and time. Check the count with the formula above before going below about 20 m on a big biome.
Performance
Fast: three short GPU steps. The cost, and the cost of the output that spawns things, grows with the number of points, which grows with the square of 1 ÷ Spacing.
Related nodes
- Points, Spread, Thin Out: the three steps of Scatter as separate nodes, for more control (for example a distance map for Spread).
- Tree Output, Object Output, Detail Instance Output: spawn things at the points.
- Dots: draws points as a mask, to preview them or turn them back into texture data.
- Transform Points, Thin Out Along: adjust points after scattering.
For AI agents
- Type name:
ScatterNode. - Slot ids: Density =
0(input, Mask), Output =100(Buffer of positions). - Properties for
vista_graphitor_node_set:spacing([x, z] meters, each ≥ 1),spreadCount(snaps: 0 → 0, 1 to 8 → 7, 9 to 15 → 15),spreadDistance(0 to 1, fraction of biome width; each copy lands at 20% to 100% of it),keepSourcePoints(bool),densityMultiplier(0 to 2),seed(int, XOR with the biome seed). - A point is kept when a random value < Density × densityMultiplier. No Density input: every point is kept (times the multiplier).
- Expected count ≈ (width × length ÷ spacing.x ÷ spacing.y) × (spreadCount + 1, or spreadCount without source points) × mean(Density) × densityMultiplier.
- The 2D viewport shows nothing for positions; add a Dots node (Absolute resolution ~256) to see them, or use
vista_graphitor_display --as positionsfor pins in 3D. - Pitfalls: Spread Count 0 + Keep Source Points off = no points; Spread Count 0 = points on an exact grid; same seed on two Scatters puts objects on the same spots.