Hydraulic Erosion 2 Node
- Category: Nature
- Edition: All editions
- Output type: Height and Mask
- Typical place in a graph: after the base shape, before texturing and spawning
Hydraulic Erosion 2 carves the land the way rain does over thousands of years. Water falls on the terrain, gathers into streams, cuts gullies and valleys into the slopes, carries the loosened soil downhill and leaves it on flatter ground. A raw noise shape turns into mountains with drainage networks, sharp ridges and smooth valley floors. Its second output, Soil, marks where the ground was carved or buried, ready to drive soil, gravel or sand textures.
When to use it
- Make any mountain or hill shape look natural. Almost every terrain built from noise benefits from it.
- Cut drainage channels and gullies into slopes, and flatten valley floors with settled sediment.
- Get a soil or sediment mask that follows the water, for texturing valleys and channels.
- Protect hard rock, such as a mesa top, from erosion while the walls around it are carved.
- Not for: rock and sand sliding down to a stable slope, softening cliffs or making scree (use Thermal Erosion 3, often right after this node); visible rivers and lava flows (use Flow).
Inputs
| Slot | Type | Required | What to connect |
|---|---|---|---|
| Height | Mask | Yes | The terrain height to erode, usually the base shape after Levels or Combine. With nothing connected, both outputs are empty. |
| Hardness | Mask | No | A mask of hard rock. 1 is not carved at all, 0 erodes fully, values in between erode partly. Sediment can still settle on hard areas. With nothing connected, everything erodes. |
Outputs
| Slot | Type | What it holds |
|---|---|---|
| Height | Mask | The eroded terrain height. The small detail of the input height is kept, with the erosion added on top. |
| Soil | Mask | Where the original ground was disturbed, from 0 to 1: channels scoured by flowing water, and sediment settled in valleys and hollows. Both reveal bare soil, so they share one mask. It is only computed when something is connected to it. |
Properties
Apply Preset
The Apply Preset... button at the top replaces all settings with a tested starting point. Nothing remembers which preset you chose, so you can change anything afterwards.
| Preset | What it does | Iteration | Feature Size | Rain Over Time | Erosion / Deposition Rate | Deposit / Drainage Ramp |
|---|---|---|---|---|---|---|
| Macro (the defaults) | Broad drainage over whole mountains | 500 | 8 | Full until 0.25, off at 0.75 | 10 / 0.3 | 5 / 100 |
| Micro | Fine, dense gullies | 200 | 2 | Full until 0.5, off at 0.85 | 5 / 0.5 | 10 / 300 |
Both use Rain Rate 10, Sediment Capacity 100, Evaporation Rate 10 and no border fade.
General
| Property | Default | Range | What it does on the terrain |
|---|---|---|---|
| Iteration | 500 | 1 and up | How long the rain runs, in simulation steps. More steps carve deeper, longer channels and fill valleys flatter, and take longer to bake. Around 100 barely marks the land; 200 to 500 is typical; 1500 cuts deep and floods the valleys with sediment. |
| Iteration Per Frame with Auto | Auto on | 1 and up | How many steps run in each editor frame. With Auto on, Vista picks a safe number for the resolution so the editor stays responsive and the graphics driver never times out. Turn Auto off only to bake faster on a strong GPU, and raise the number carefully. |
| Feature Size | 8 | 1 and up, meters | The size of the smallest channel the water can carve. The simulation works on a grid of this many meters per cell. 8 carves broad drainage over whole mountains; 2 to 4 adds fine, branching gullies but bakes slower; 1 is the finest. The buttons under the field pick 1, 2, 4, 8, 16 or 32. The small detail of the input height is always kept, whatever the size. |
| Use Border Fade | Off | On, Off | Fades the erosion out toward the edges of the biome so it blends into the land around it. Without it, water draining off the edges can dig deep pits along the border, especially with strong rain. See Border fade. |
Hydraulic Erosion
| Property | Default | Range | What it does on the terrain |
|---|---|---|---|
| Rain Rate | 10 | 0 and up, millimeters per step | Water added in each step. More rain makes more and stronger streams, so channels cut deeper and valleys fill flatter. |
| Rain Over Time | Full until 0.25, off at 0.75 | Curve from 0 to 1 | Rain strength over the run, from start (left) to end (right). Letting it fall to 0 before the end gives the water time to drain away and the sediment time to settle into smooth valley floors. |
| Sediment Capacity | 100 | 0 and up | How much soil flowing water can carry. Higher values let streams cut deeper and move more material down into the valleys. |
| Erosion Rate | 10 | 0 to 100 | How quickly water picks up soil. Higher values carve channels faster. Rain Rate and Sediment Capacity usually change the result more. |
| Deposition Rate | 0.3 | 0 to 100 | How quickly water drops the soil it carries. Low values carry soil far into the valleys; high values drop it sooner, which softens the channels and smooths the slopes. |
| Evaporation Rate | 10 | 0 and up, millimeters per step | Water removed in each step. Higher values dry the streams out sooner, so erosion stays light; lower values let more water run and carve. |
Soil Output
These only change the Soil output, not the terrain.
| Property | Default | Range | What it does |
|---|---|---|---|
| Deposit Ramp | 5 | 0.01 and up, centimeters | The depth of settled soil at which Soil is fully on. Lower values also show thin deposits. |
| Drainage Ramp | 100 | 0.01 and up, centimeters | The depth of carved channels at which Soil is fully on. On steep terrain the default lights up almost every slope; raise it to 500 to 2000 to keep the mask on the main channels. |
Common properties
| Property | What it does |
|---|---|
| Id | The node's unique name in this graph, shown for reference. You cannot edit it. Scripts and the AI workflow CLI use it to find the node. |
| Resolution | How detailed this node's result is, in texels across the biome. Relative To Main Input (default) matches the height connected to Height, times the multiplier below it. Relative To Graph follows the biome's Canvas Resolution instead. Absolute sets an exact size. This is the size of the outputs, not of the simulation, which Feature Size sets. The simulation never runs finer than the output, though. Absolute is limited to 32 to 512 in Vista Personal and 32 to 4096 in Vista Indie and Pro. |
| Split Execution | This node always runs over several frames, whatever this setting says, so the editor stays responsive during the bake. The 3D viewport shows the terrain eroding live. Iteration Per Frame sets the pace. |
| Bypass | Skips the node. The input height passes through unchanged, so you can compare the terrain with and without erosion. Soil is empty while bypassed. |
How it works
The node runs a small water simulation on the terrain:
- Rain falls everywhere, as much as Rain Rate, shaped over time by Rain Over Time.
- Water flows downhill and gathers in channels. Fast water picks up soil, up to what Sediment Capacity allows.
- Where the water slows down, in valleys and on flat ground, it drops the soil again (Deposition Rate).
- Some water evaporates in each step (Evaporation Rate).
After Iteration steps, the change in height is added to your input, and the record of where soil was carved and where it settled becomes the Soil mask.
The simulation works on a coarser grid than your terrain, set by Feature Size, and the result is scaled back up onto the full resolution height. That is why it is fast, and why the fine detail of your input survives. It also means the simulation is the same speed on a 1 km biome at 1024 or 4096 texels. The grid is capped at 2048 cells across: on a very large biome with a small Feature Size, the node shows a warning badge and bakes at the coarsest size that fits.
Results are cached: if neither the input nor the settings change, the next generation reuses the last bake instantly.
Examples
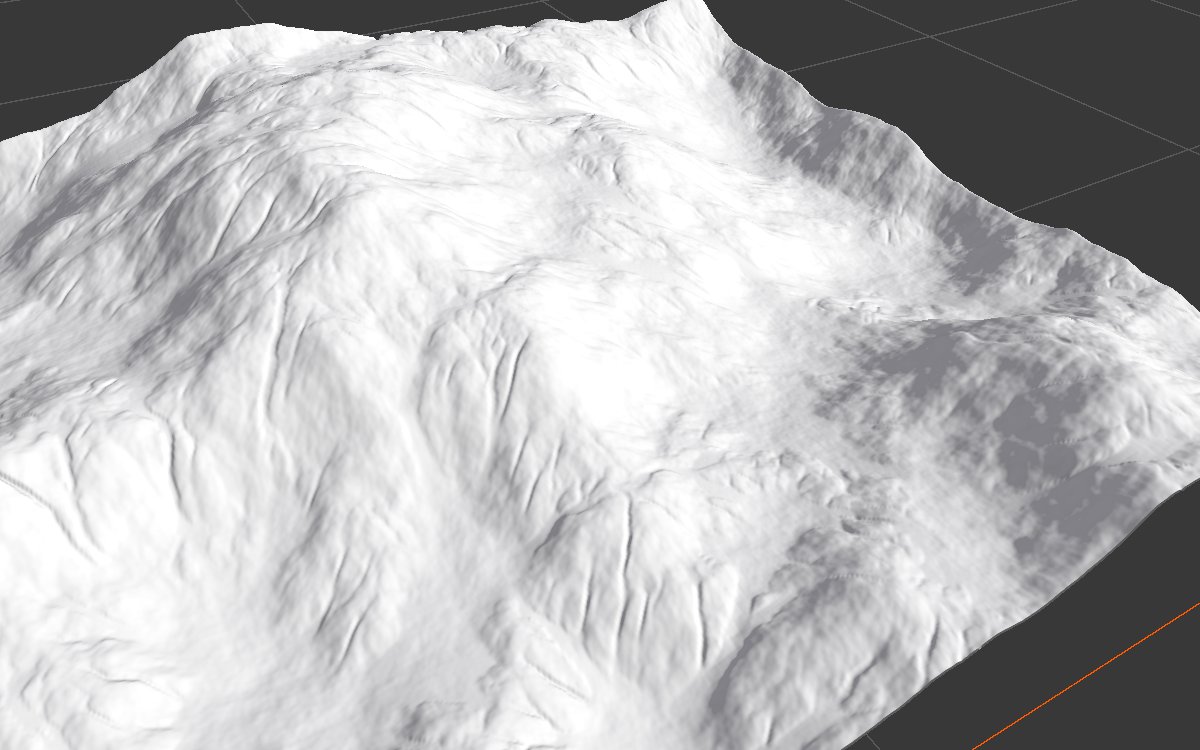
All examples erode the same Noise (Scale 600, Seed 128) on a 1024 × 1024 m biome with a terrain height of 400 m. Values not listed are the defaults (the Macro preset). The 3D views are closer than on other pages so the channels are visible.
Before and after
 |
 |
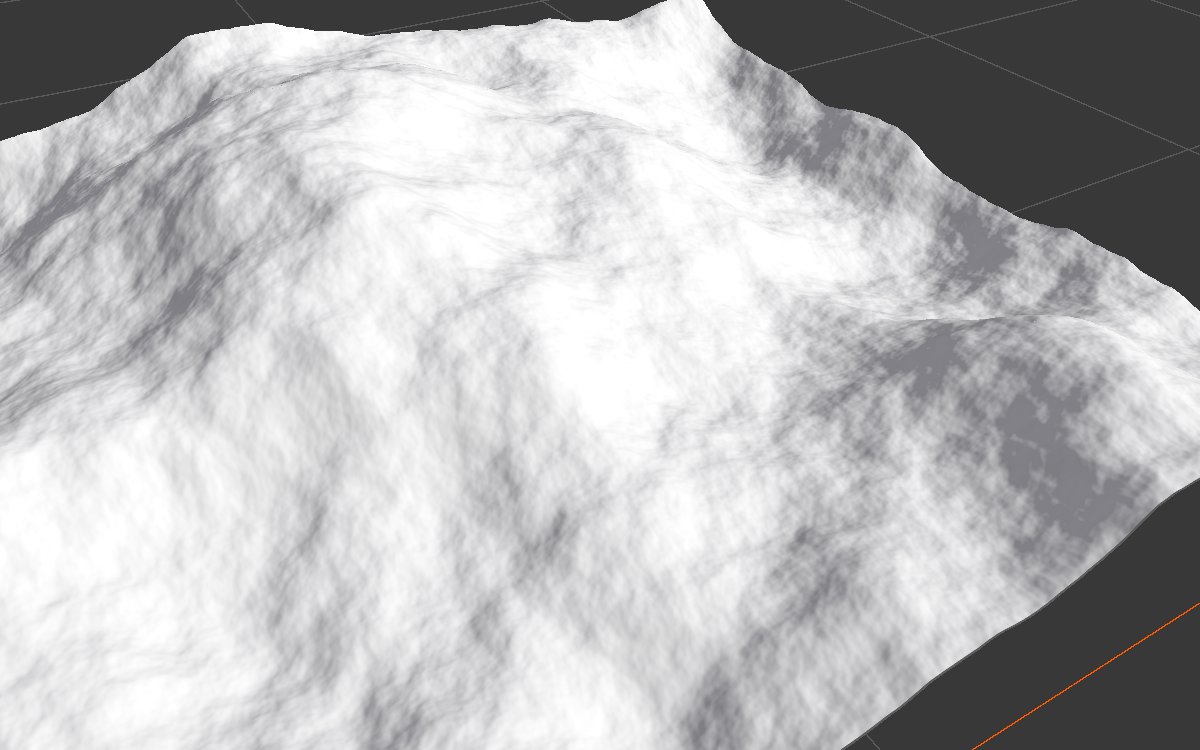
| Before (node bypassed) | Default settings (Macro) |
With the defaults, the slopes get broad drainage channels and the valleys fill with flat sediment. Up close, the channels at Feature Size 8 can look slightly beaded, as a chain of small bumps. A finer second pass removes that (see Coarse and fine passes).
Feature Size
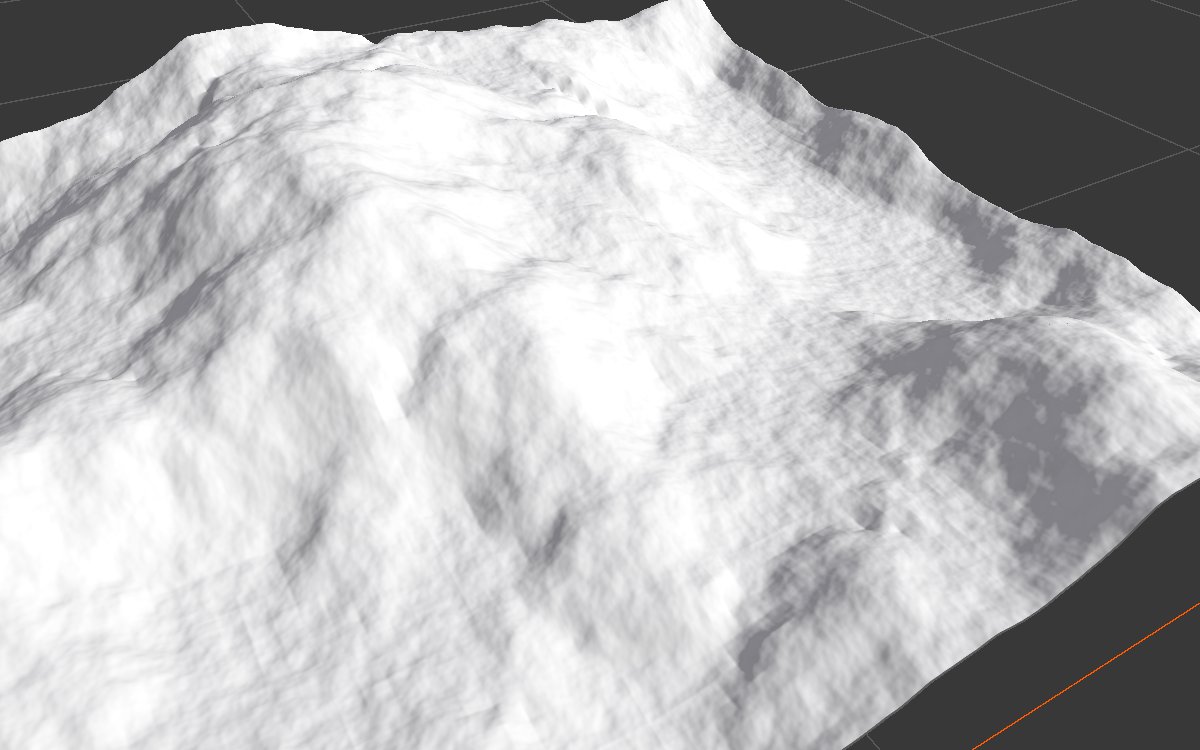
| Feature Size 16 | Feature Size 8 (default) |
|---|---|
 |
|
| Feature Size 4 | Feature Size 2 |
 |
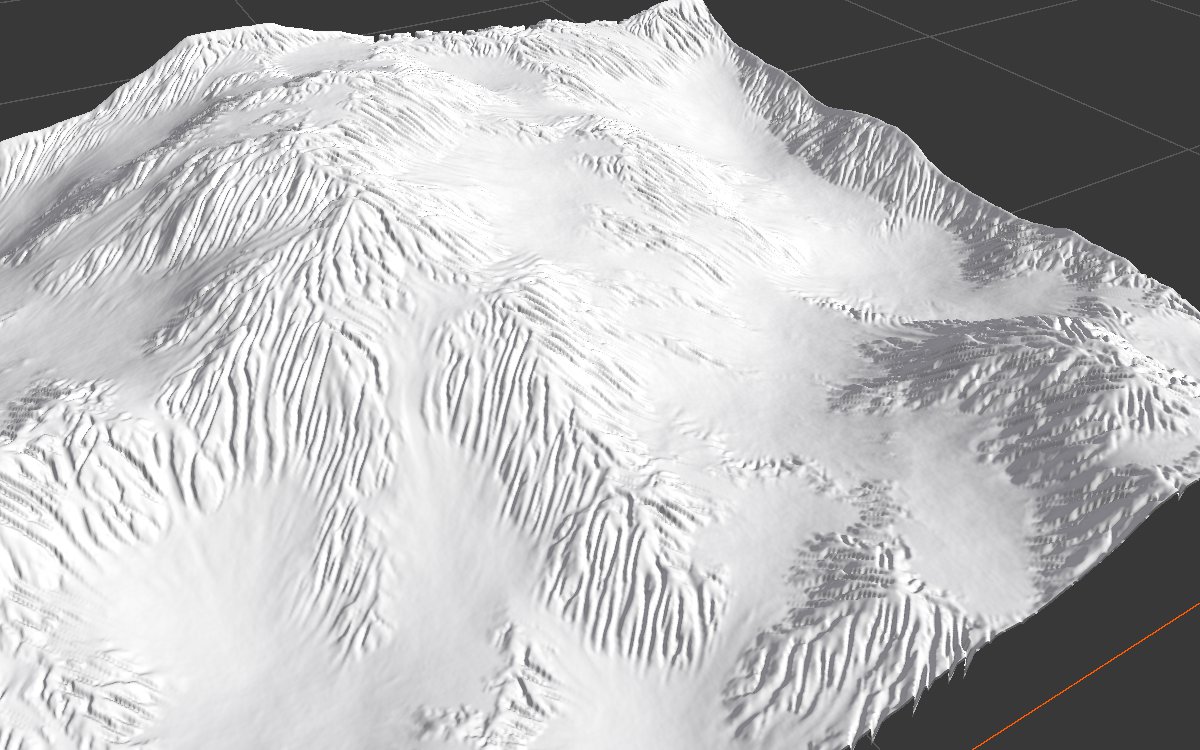 |
The most important setting. Large sizes carve only the main drainage; small sizes add dense, branching gullies that read as real weathered rock. Each halving of the size makes the bake roughly four times slower.
Iteration
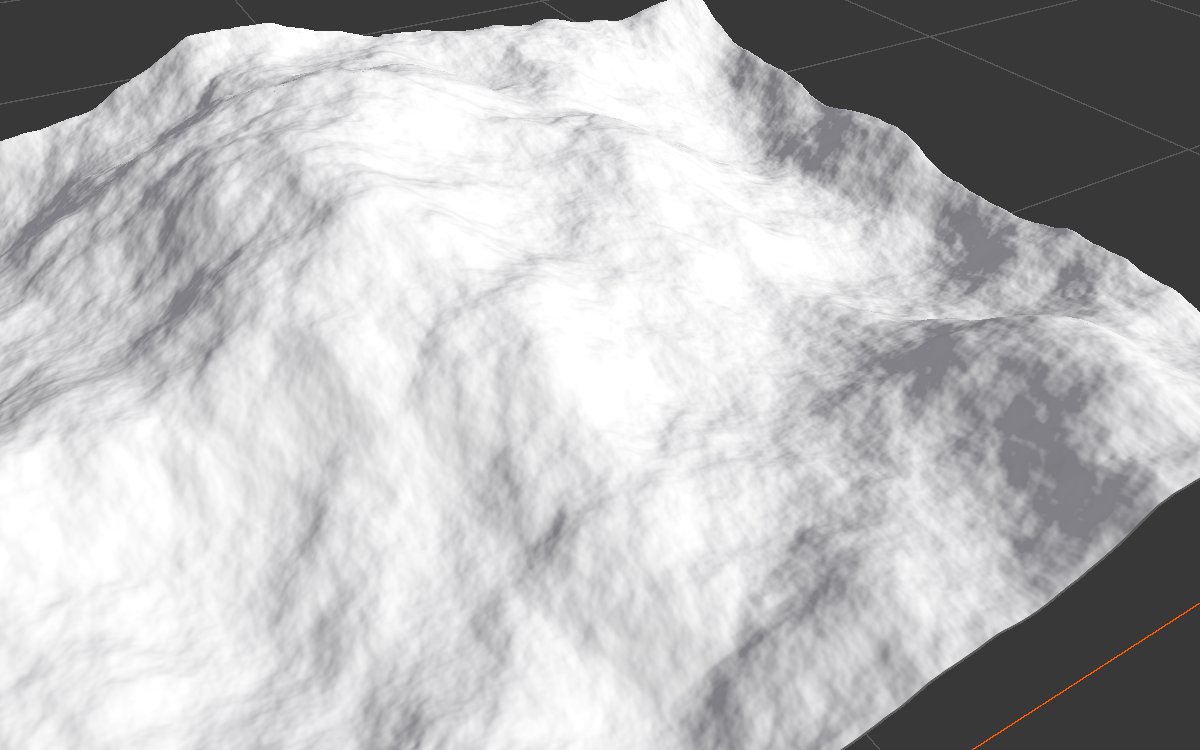
| Iteration 100 | Iteration 1500 |
|---|---|
 |
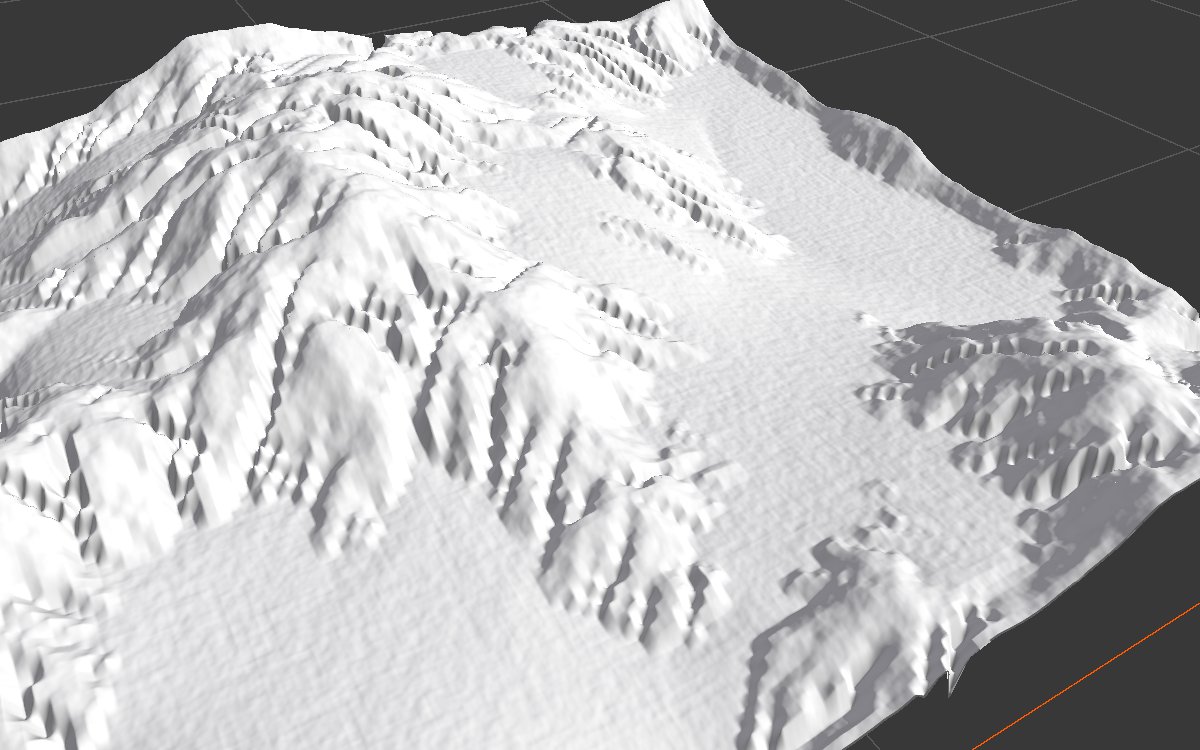 |
Short runs barely mark the land. Long runs carve deep channels and fill the valleys into wide, flat plains of sediment.
Micro preset
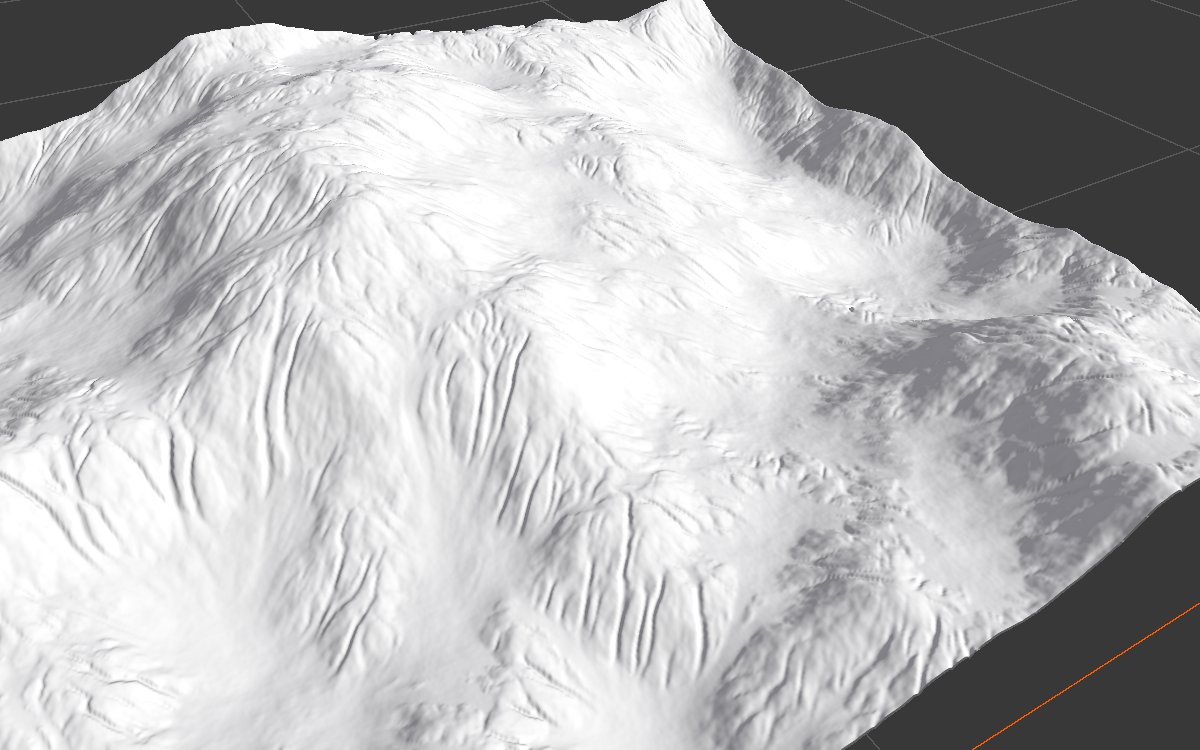
Feature Size 2 with gentler rates: fine gullies everywhere, with less change to the large shape. Good as a second pass, or on its own for hills that should keep their silhouette.
Water and sediment
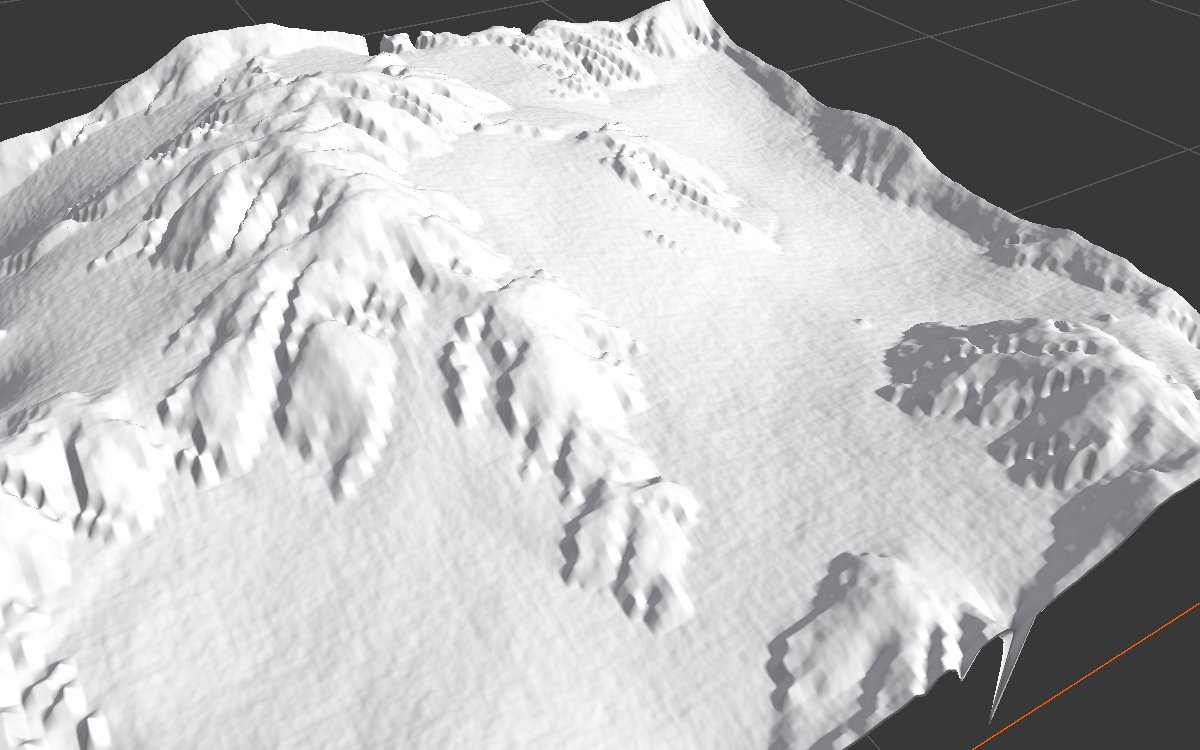
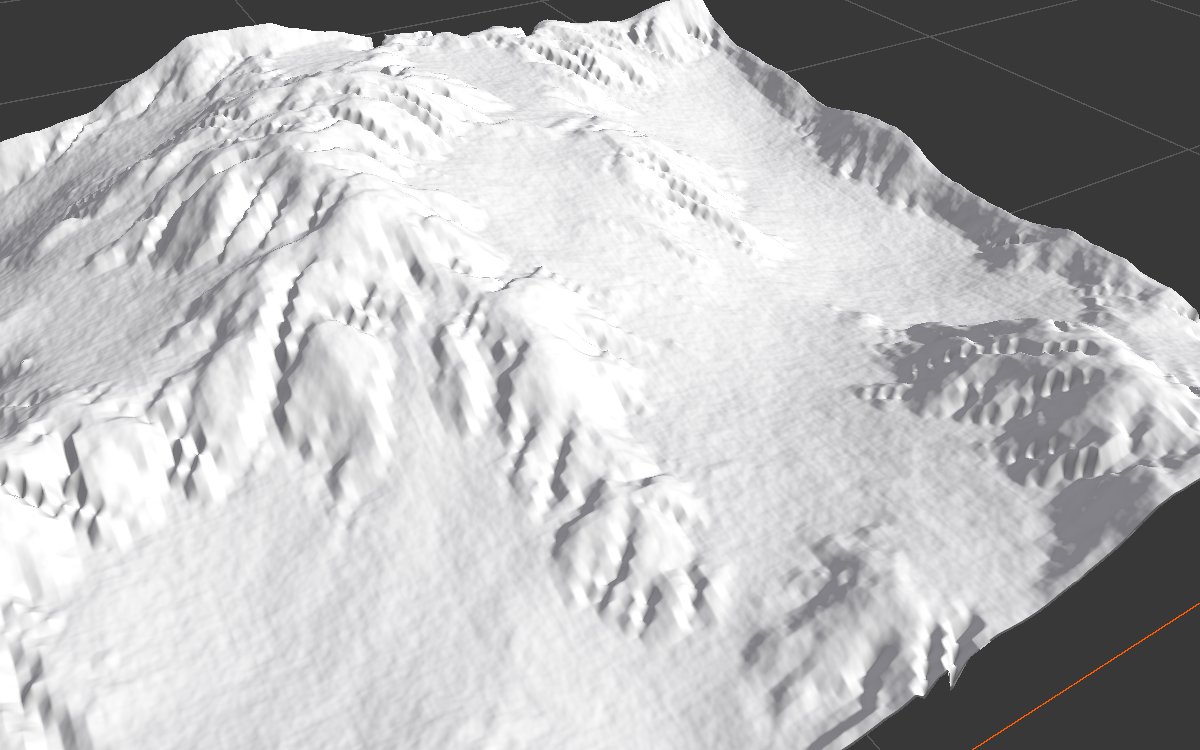
| More rain: Rain Rate 30 | More capacity: Sediment Capacity 300 |
|---|---|
 |
 |
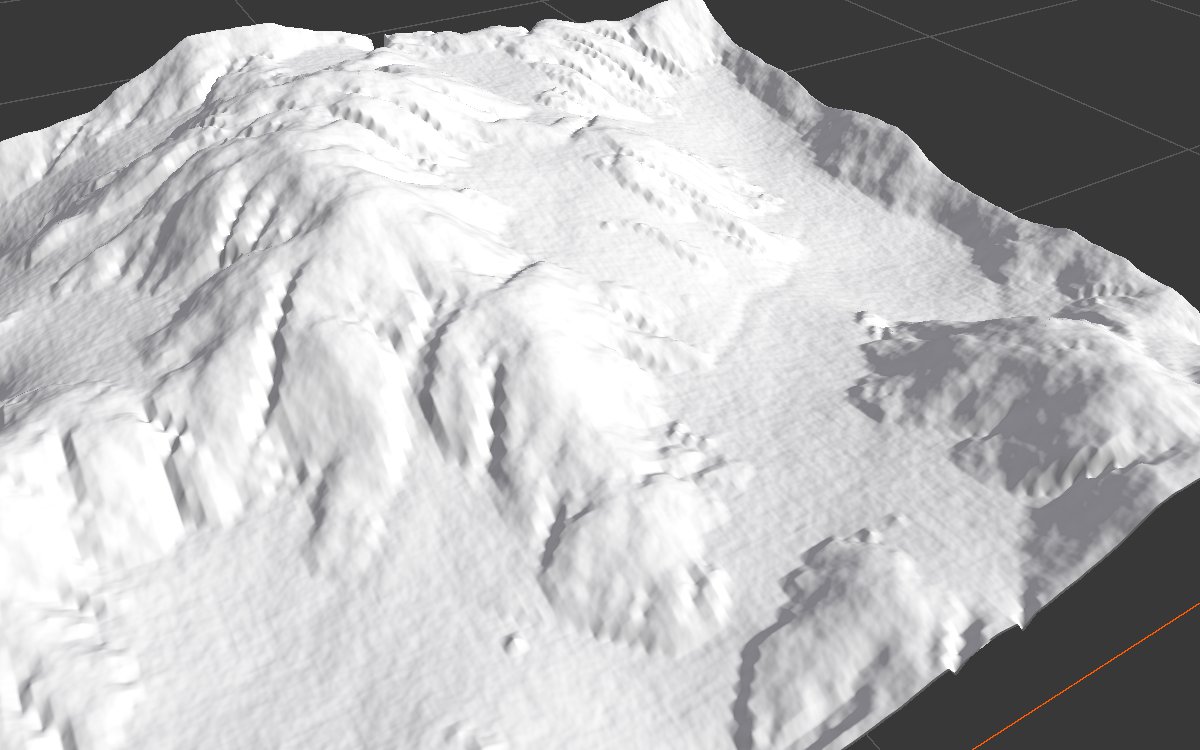
| Little evaporation: Evaporation Rate 2 | Strong evaporation: Evaporation Rate 30 |
 |
 |
| Faster erosion: Erosion Rate 40 | Faster deposition: Deposition Rate 10 |
 |
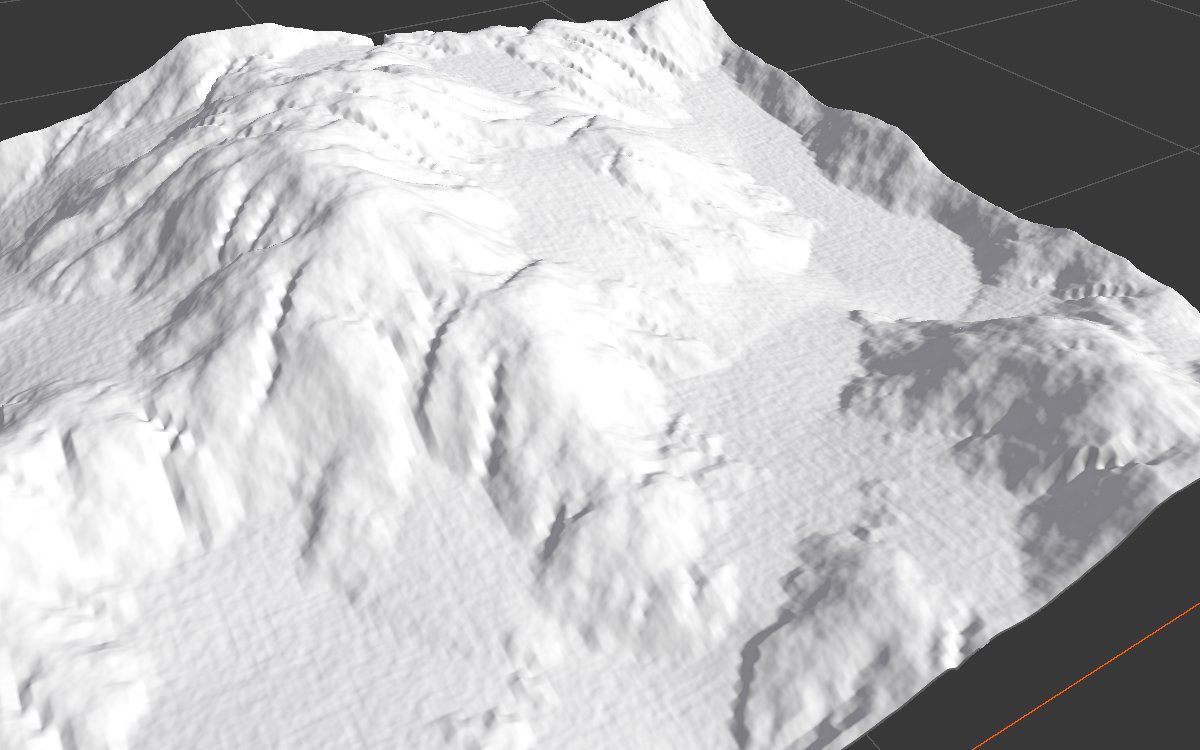 |
More water, more capacity or less evaporation all mean stronger erosion. Erosion Rate changes surprisingly little on its own, because the water can only carry as much as its capacity allows. Deposition Rate is the smoothing control: the soil drops sooner, softening the channels and removing their beaded look.
Constant rain
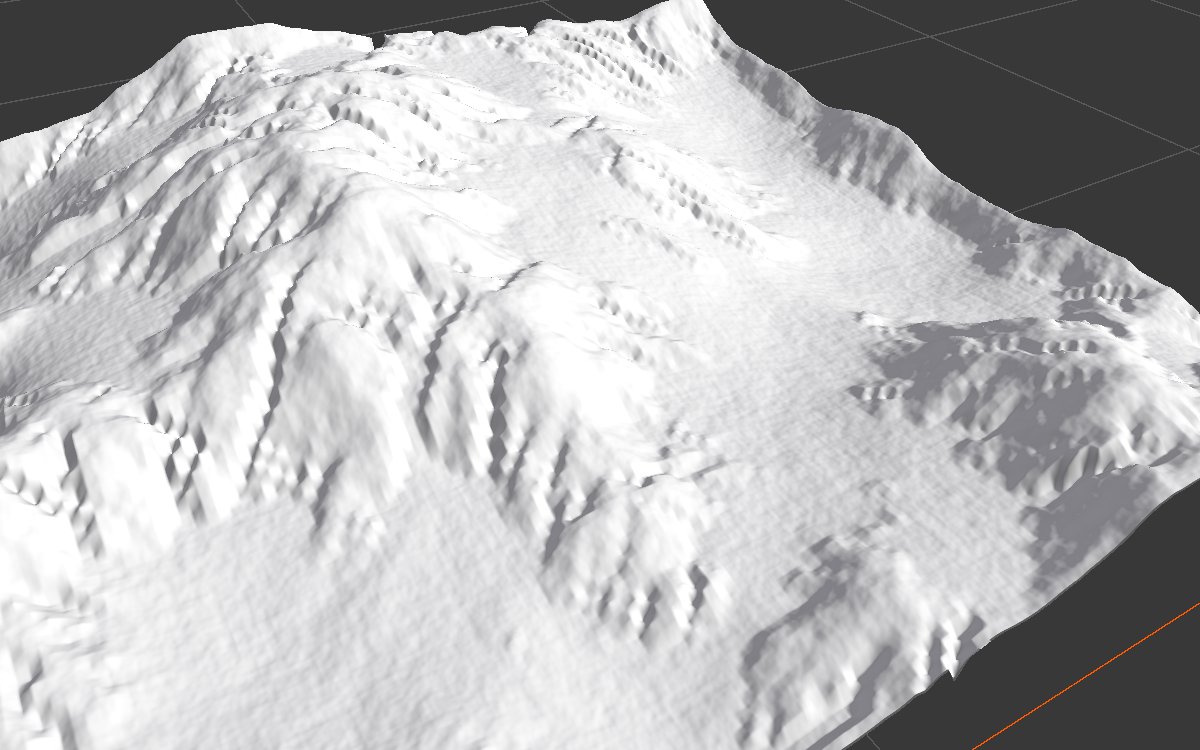
Rain Over Time flat at 1: it rains until the last step. The water never gets the chance to drain and drop its load, so the valleys hold less settled sediment. Keep the default ramp unless you have a reason.
Border fade
| Use Border Fade off | Use Border Fade on |
|---|---|
 |
 |
Both with Rain Rate 30, seen from further away. Without border fade, water that runs off the edge of the biome digs deep pits along the border. Turn it on whenever the biome edge is visible or blends into another biome. The fade only affects the outer fifth or so of the biome.
Hardness
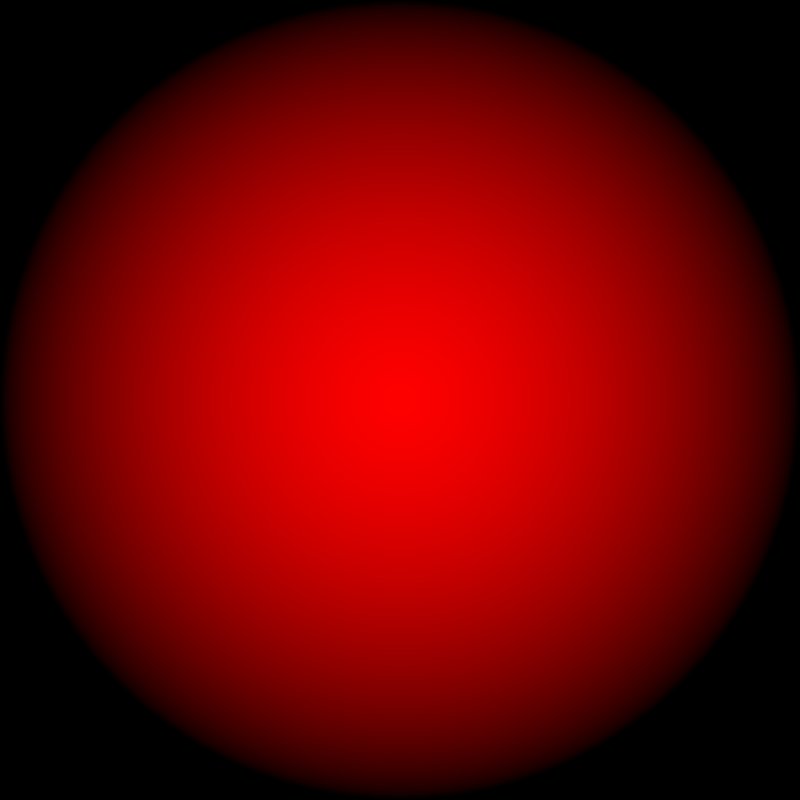
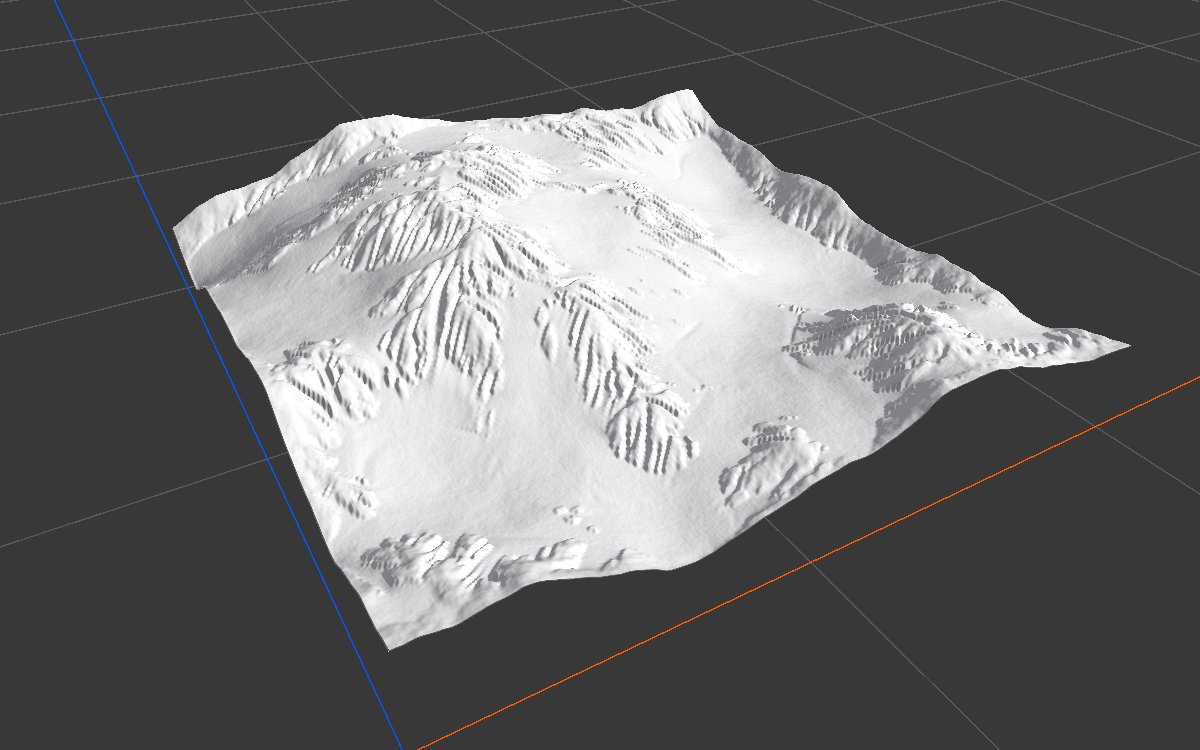
| Without Hardness | With the mask above as Hardness |
|---|---|
 |
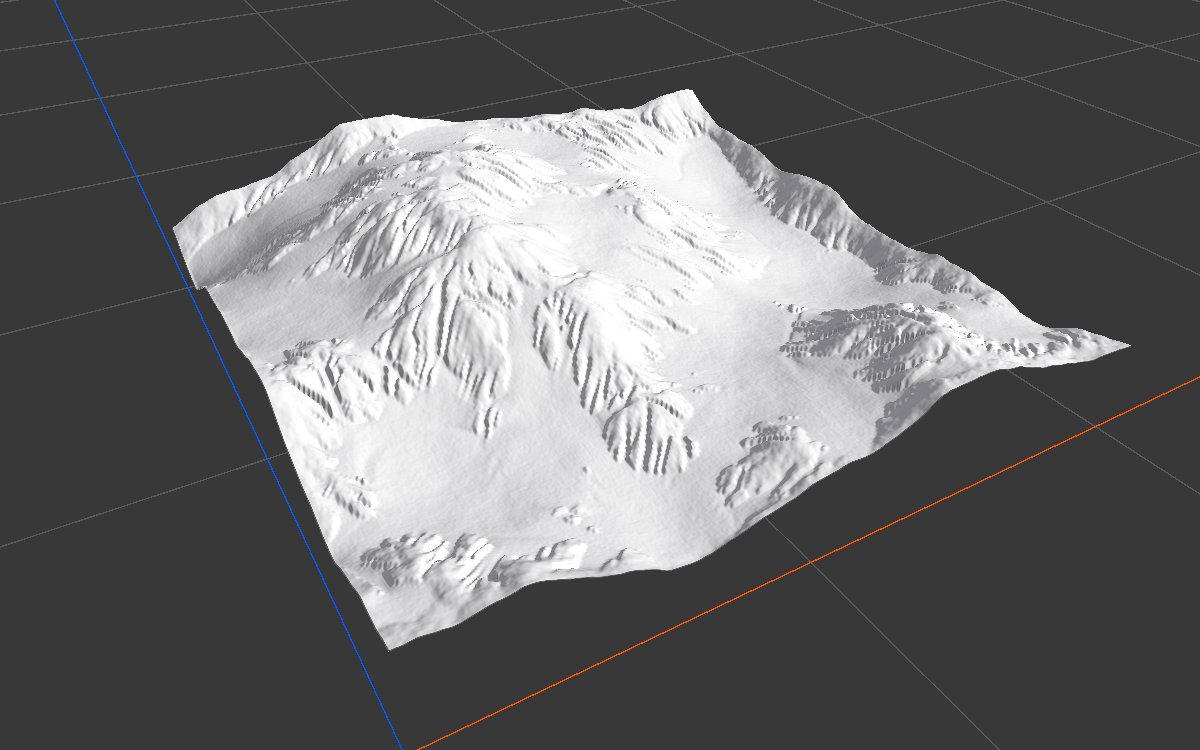 |
A Radial Gradient connected to Hardness, with Feature Size 4 and Rain Rate 20 so the gullies are easy to see. The middle of the terrain resists erosion and keeps its shape, while the outside is carved as before. In real graphs the hardness is usually a mask of the area to keep, such as a plateau top from Range Select, so only the walls and foot are carved.
Soil output
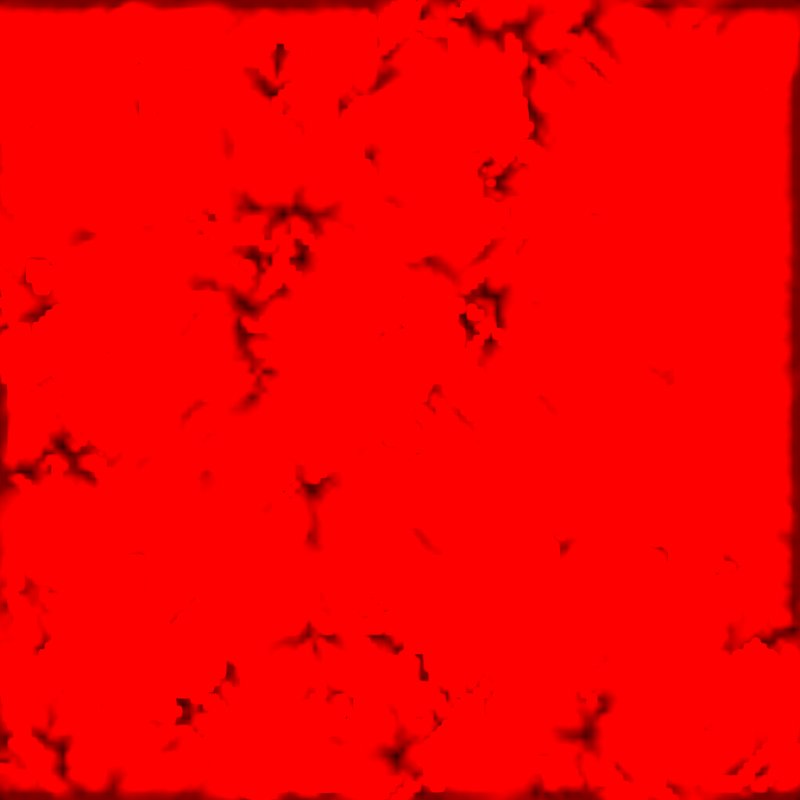
| Drainage Ramp 100 (default) | Drainage Ramp 500 | Drainage Ramp 2000 |
|---|---|---|
 |
 |
 |
 |
 |
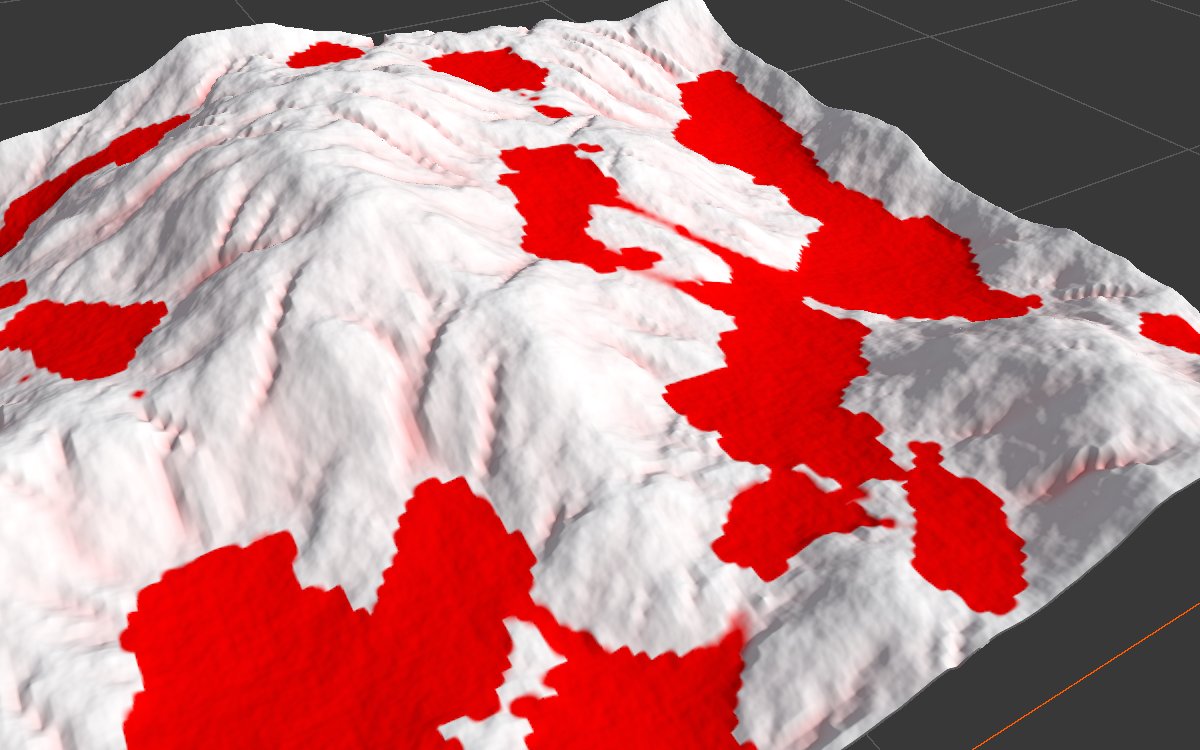 |
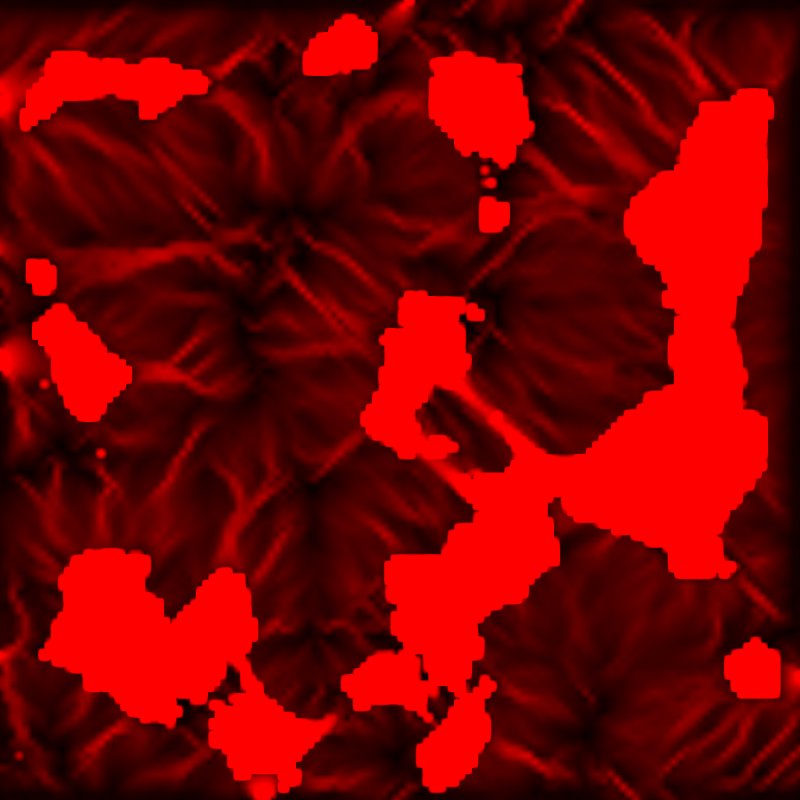
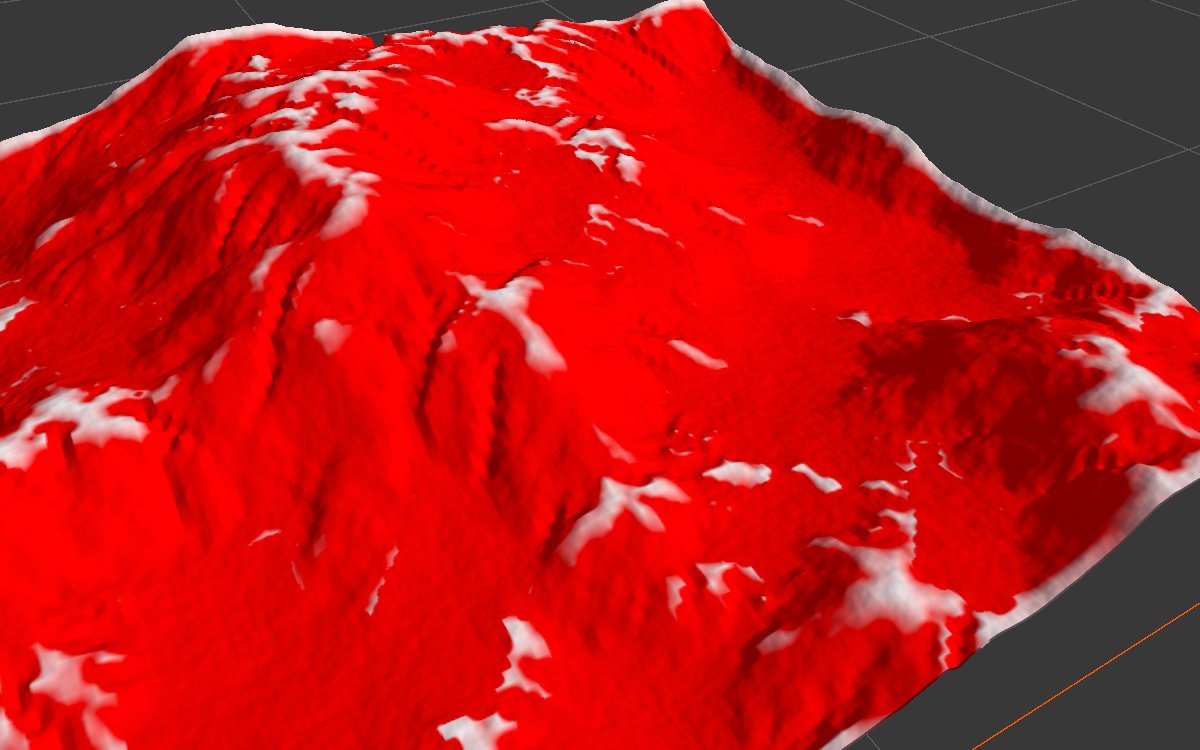
The Soil output has two parts. The solid patches are sediment that settled in the valleys (Deposit Ramp). The streaks are channels the water carved (Drainage Ramp). On this steep terrain the default Drainage Ramp counts almost every slope as carved; at 500 the channel network shows; at 2000 mostly the deposits remain.
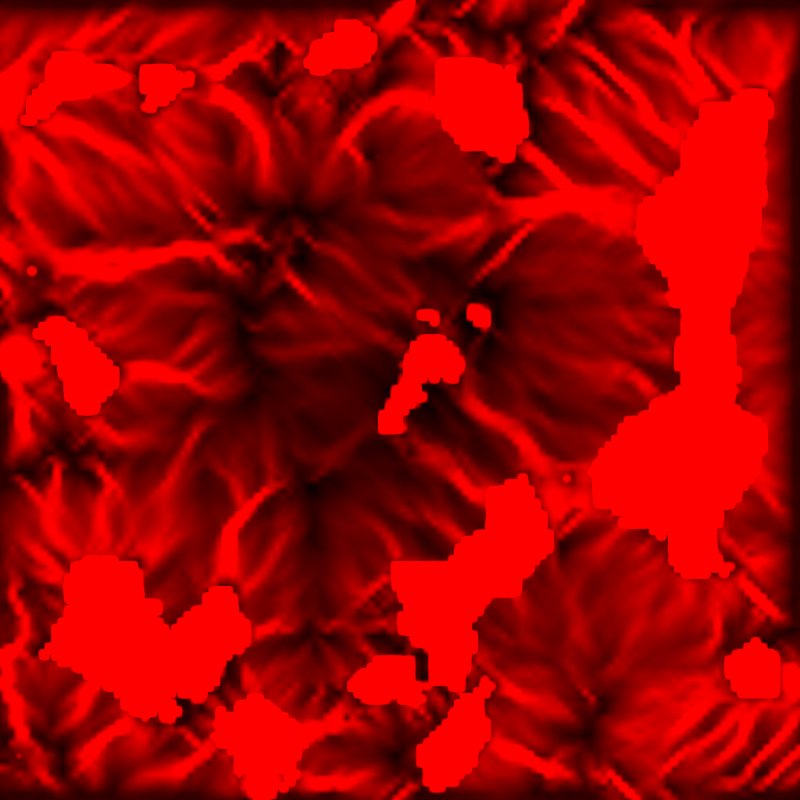
With the Hardness mask from above (Drainage Ramp 500), the protected middle shows far fewer channels.
Coarse and fine passes

Two nodes in a row: the first with Feature Size 8 carves the main drainage, the second with Feature Size 2 adds fine gullies on top of it. This looks more lifelike than any single pass. Settings, from the AI workflow recipe hydraulic-erosion-coarse-fine:
| Coarse pass | Fine pass | |
|---|---|---|
| Feature Size | 8 | 2 |
| Iteration | 200 | 200 |
| Rain Over Time | Full until 0.25, off at 0.75 | Full until 0.5, off at 0.85 |
| Sediment Capacity | 50 | 50 |
| Erosion Rate | 10 | 5 |
| Deposition Rate | 0.3 | 0.1 |
| Deposit / Drainage Ramp | (not used) | 10 / 300 |
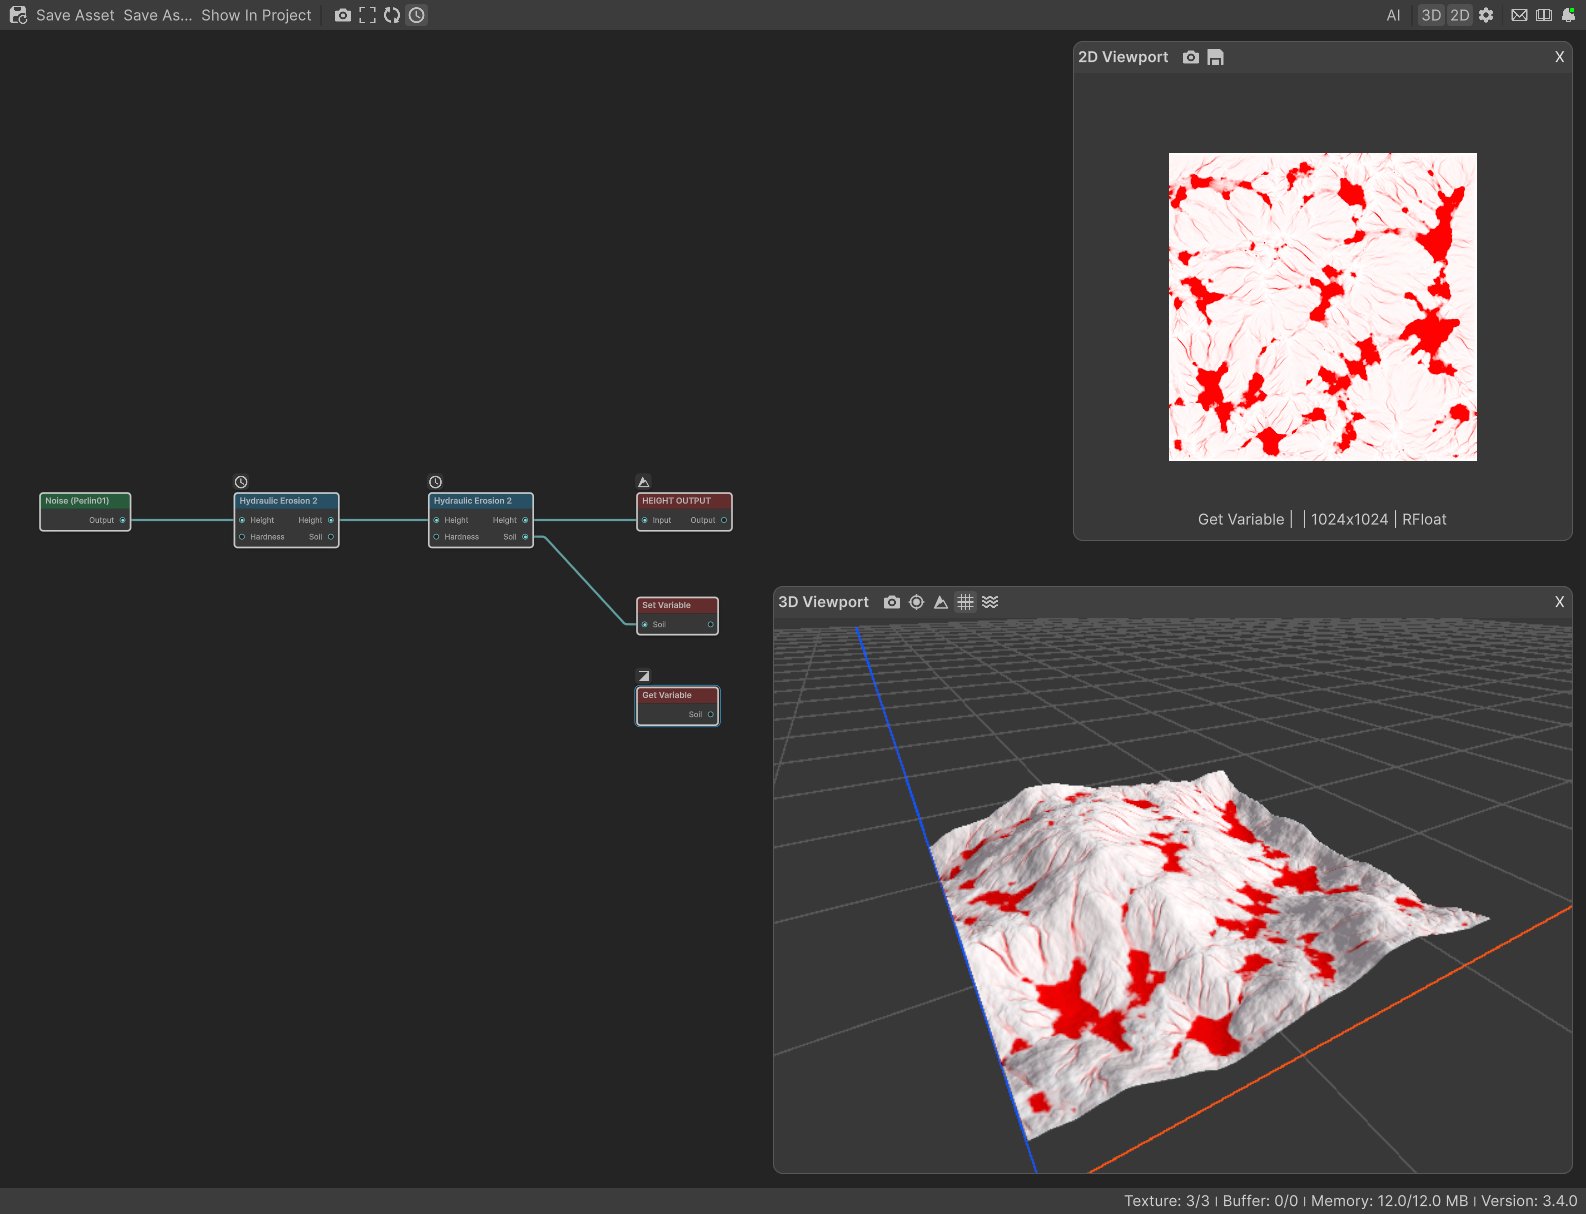
Take the Soil mask from the last pass, as in the graph above.
Recipes
- Natural mountains: Noise → Levels → Hydraulic Erosion 2 (coarse) → Hydraulic Erosion 2 (fine) → Thermal Erosion 3 for loose material on the steepest slopes → Height Output.
- Soil texture in valleys and channels: last pass Soil → Blur or Curve to soften the hard edges of the deposits → weight of a soil or gravel layer in Weight Blend.
- Mesa with protected top: mesa shape → Range Select for the top → Hardness, with strong settings (Feature Size 4, Rain Rate 30, Deposition Rate 10, Evaporation Rate 30, 200 iterations), then Thermal Erosion 3 to slide sand down the channels. Recipe
mesa-geometry. - Peaks and ridge crests: Soil made full strength, combined with a flat ground Slope Mask, then inverted: what is left was never touched by water. Recipe
peak-highlight-from-erosion.
Tip
Tune with a large Feature Size first: it bakes in a second or two, so you can try settings quickly. Lower it once the overall look is right.
Tip
Read slopes, heights and curvature for texturing from the eroded height, not from the shape before erosion. Erosion moves valleys and steepens gullies.
Note
Soil's deposits come out with hard edges, because the simulation grid is coarser than the terrain. Soften the mask with Blur before using it for textures.
Note
Erosion depends on the real size of the land: the same settings carve a steep, 400 m high mountain much more than gentle 50 m hills. When you change the terrain height or biome size, check the erosion again.
Warning
Use Border Fade is off by default. If you see deep pits or spikes along the edges of a biome, turn it on.
Warning
Small Feature Size values on large biomes are slow, and past 2048 simulation cells across, the node bakes coarser than you asked and shows a warning badge. Raise Feature Size, or split the area into smaller biomes.
Performance
The cost grows with Iteration and with the simulation grid, which is the biome width divided by Feature Size: halving Feature Size makes each step about four times as expensive. On a 1 km biome, the Macro preset (Feature Size 8, a grid of 128 cells across) bakes in about two seconds in the editor. Output Resolution only affects the final upscaling, which is cheap. Unchanged nodes load from the cache instantly.
Related nodes
- Thermal Erosion 3: loose material sliding to a stable slope; use it after this node for scree and softened cliffs.
- Flow: simulates where water or lava runs and pools, without carving the land.
- Landslide: mass movement down steep slopes.
- Hydraulic Erosion: the older version, deprecated.
For AI agents
- Type name:
HydraulicErosionNode2. - Slot ids: Height in =
0, Hardness =1(inputs, Mask); Height out =100, Soil =101(outputs, Mask). Soil is only computed when something consumes it; to preview it, connect it (for example to a Set Variable). - Properties for
vista_graphitor_node_set:iterationCount(≥ 1),useAutoIterationPerFrame(bool),iterationPerFrame(≥ 1),featureSize(int meters, ≥ 1),useBorderFade(bool),rainRate(mm/step, ≥ 0),rainOverTime(curve, keys [[time, value, inTangent, outTangent]]),sedimentCapacity(≥ 0),erosionRate(0 to 100),depositionRate(0 to 100),evaporationRate(mm/step, ≥ 0),depositRamp(cm, ≥ 0.01),drainageRamp(cm, ≥ 0.01). - The node runs over several frames; a capture right after
node_setcan show a partial result. Capture again until the stats stop changing (about 2 s for the Macro preset on a 1 km biome). - Bypass passes the input height through; Soil is empty.
- Measured on the sample terrain: Soil at the default ramps is fully on over about 86% of the area; Drainage Ramp 500 gives about 30%, 2000 about 25% (mostly deposits).
- Pitfalls: Soil from an earlier pass in a chain; border pits without border fade; Erosion Rate alone barely changes the result; Soil saturating on steep terrain at the default Drainage Ramp.