Component overview
Local procedural biome (LPB) is a biome type with the following characteristics:
Local: it defines a fixed polygonal region in the scene.
Procedural: it uses graphs & parameters to generate its data.
To create a LPB instance, right click on the VM in the Hierarchy then select 3D Object>Vista>Local Procedural Biome.
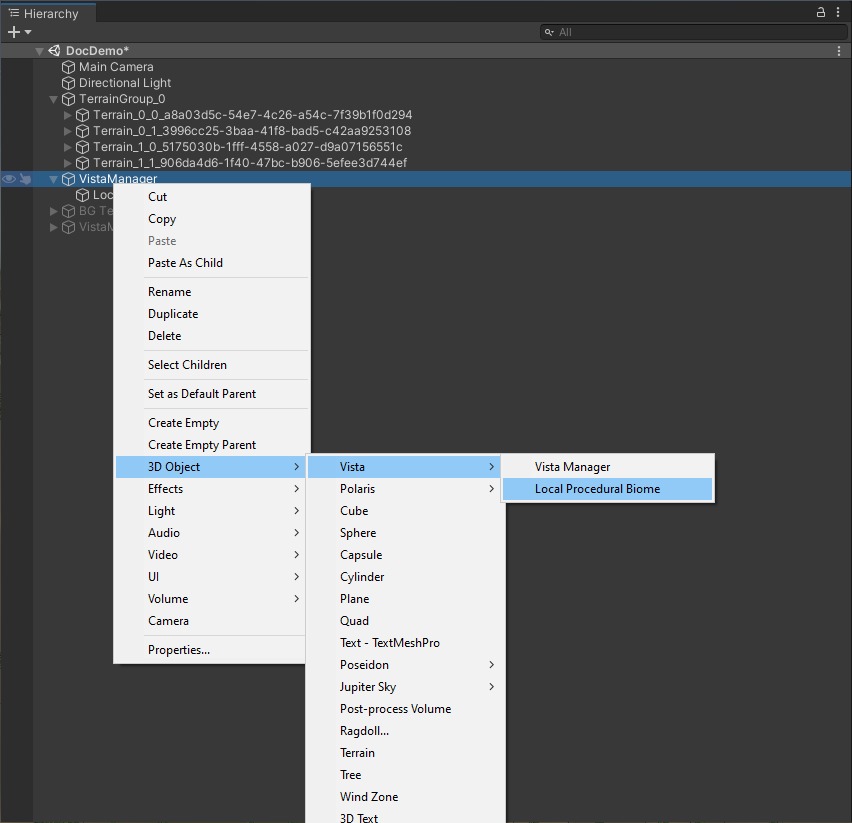
Figure: Vista for Unity component overview showing creating a lpb instance in the Unity Editor.
In the Inspector, you will see the following properties:
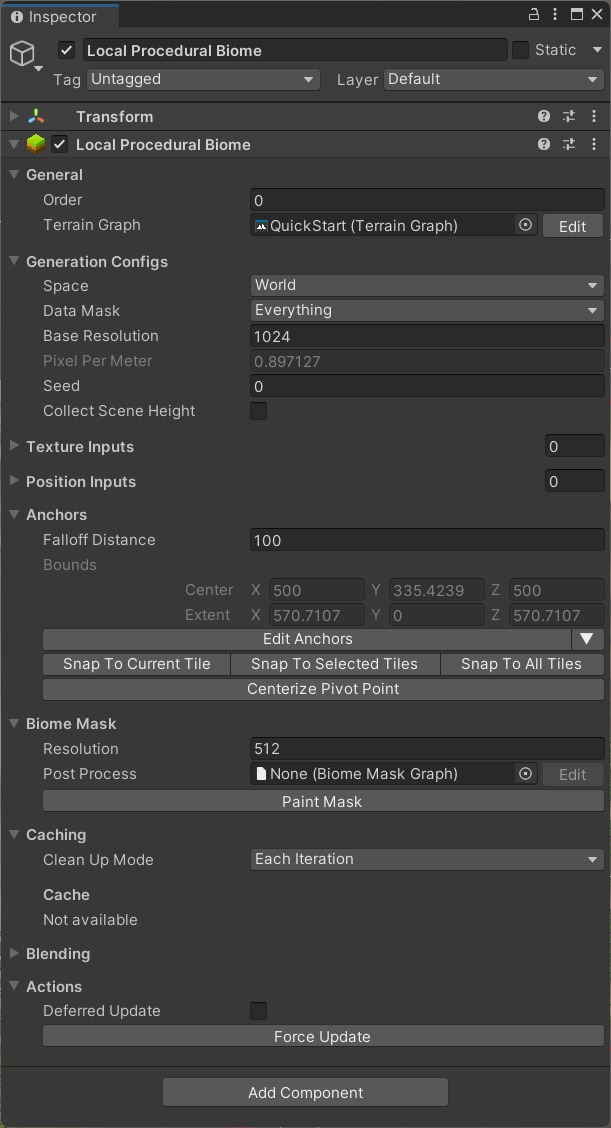
Figure: Vista for Unity component overview showing in the inspector in the Unity Editor.
Under the General section:
Order: processing order of this biome. Biomes with higher order will be processed later in the queue.
Terrain Graph: the terrain graph asset contains rules for this biome. You can double click on the graph to open it, but it’s better to use the Edit button, since it will feed some data into the graph editor.
Under the Generation Configs section:
Space: whether to use Local or World space coordinates. If you want an almost identical result no matter where the biome is in the scene, select Local.
Data Mask: Filter out the biome output where unnecessary data will be ignored. For example, if you uncheck the Height Map flag, the graph won't output height data even when you have added a Height Output Node.
Base Resolution: the base/expected size in pixels of generated textures. The actual output may have different resolution since nodes can override this value
Pixel Per Meter: The number of pixels to cover 1 meter in world space, calculated based on the Base Resolution and the biome anchors. Higher value means higher quality but uses more VRAM..
Seed: an integer to randomize the graph output. Different values will generate completely different outputs
Collect Scene Height: Should it render a scene height map and feed to the graph as input? To access this texture, create a Graph Input node and use the “Scene Height†input name.
Under the Texture Inputs and Position Inputs section:
- These lists contain the Texture2D asset and Position Container asset that you want to feed into the graph as input, which in turn can be accessed using the Input node. Note that the name you set for each input here should match with the name in the Input node, it's also your responsibility to ensure input names are unique.
Under the Anchors section:
Falloff Distance: size of the falloff area. Falloff area is where the biome data will gradually fade out and blend with underlying biomes.
Bounds: the biome bounding box in world space.
Edit Anchors: enableanchor editing in the Scene View.
Snap To Current Tile: automatically fit the biome to the tile right at its position.
Snap To Selected Tiles: automatically fit the biome to tiles in selection.
Snap To All Tiles: automatically fit the biome to all tiles.
Centerize Pivot Point: Move the biome’s pivot point to the center of its anchors.
Under the Biome Mask section:
Resolution: the size in pixels of the biome mask texture. This texture is generated using the biome’s anchors and will be used for biomes blending.
Post Process: a biome mask graph used for post processing the mask texture. You can use this graph to add more detail such as exponential fade, noise falloff effect to the mask for a more interesting transition between biomes.
Under Caching section:
Clean Up Mode: Decide when to release the cache data. Choose Each Iteration when your graph is still in draft to ensure data is up to date. Choose Manually if you're working with another biome and don't want to re-generate this one every time. Note that the cache is forced to clean up on some event such as scene reloading, object deactivating, etc.
Cache: Display the data from the last generation.
Under Blending section:
Height Map: Blend mode for the height map. Let A be the current blend result, B be the height map of this biome:
Linear: The height map will gradually change from A to B.
Addictive: B will be added to A.
Subtractive: B will be subtracted from A.
Min/Max: Take the min/max value of A and B.
Textures: Blend mode for terrain textures, including alpha maps, albedo map, metallic map & generic textures. Only Linear mode is available in this version, which means the texture will gradually change from one to the other.
Detail Density: Blend mode for detail density maps. You will use Linear or Addictive for most cases. Let A be the current blend result, B be the density map of a detail template in this biome:
Linear: The density map will gradually change from A to B, which means a grass type will win over the others and become dominant.
Addictive: B will be added to A, which means many grass species will coexist in the region.
Subtractive: B will be subtracted from A.
Min/Max: Take the min/max value of A and B.
Instances: Blend mode for instance buffers, including trees, grass instances (Polaris), objects & generic buffers. Let A be the current blend result, B be the instances of a tree template in this biome:
Linear: The tree instances will gradually change from A to B, which means a tree type will win over the others and become dominant.
Addictive: B will be added to A, which means many tree species will coexist in the region.
Under the Actions section:
Deferred Update: Turn this on if you want to make several changes to the biome before regenerating.
Force Update: invoke a full re-generate pipeline on the VM instance this biome belongs to.